


Even if you’re spending a lot of time indoors and avoiding some of the outdoors-y skin enemies like the sun and pollution, being indoors and staying at home 24/7 comes with its downsides.
Dry patches can appear from overexposure to constant heating or cooling, lack of vitamin D can make your complexion appear sullen and yup, the stress-skin connection is real (me-time? what me-time…?!).
You’d think that being at home so much right now means we have loads of spare time take care of our skin, but it just doesn’t seem to be working out that way! What gives!?
We think it's time to rock the boat.
Setting aside daily or weekly TLC time in your bathroom is the fastest way to fend off your skin grievances and iso-jitter-bugs. It’s also the easiest way to achieve a happier, healthier complexion and a restful mind.
Whether your beauty routine is more centred around relaxation – a bathtub strewn with candles, a facial oil massaged into your skin – or pumping and prepping your visage with your favourite products for another week indoors, the ritual itself is an important time-out and one in which we all deserve right now.
Plus, it’s the faster way to say “hello” to just-stepped-out-of-the-spa skin without setting foot outside your front door.
Don’t have all the high-tech gadgets and gizmos they use at the salon? No worries. You can still achieve seriously smooth, glowy and nourished skin with the right products and a few easy steps.
Ready to try it for yourself?
STEP 1 — Preparation is key!
Start by wrapping the Woohoo Skincare head band around your hairline to prevent any mess going into your locks.
STEP 2 — Let the deep cleanse commence
The first step in any facial (whether you’re in the spa or the comfort of home) is to cleanse your skin. Even if you aren’t wearing makeup right now, it’s still important to wash your face in the morning and at night.
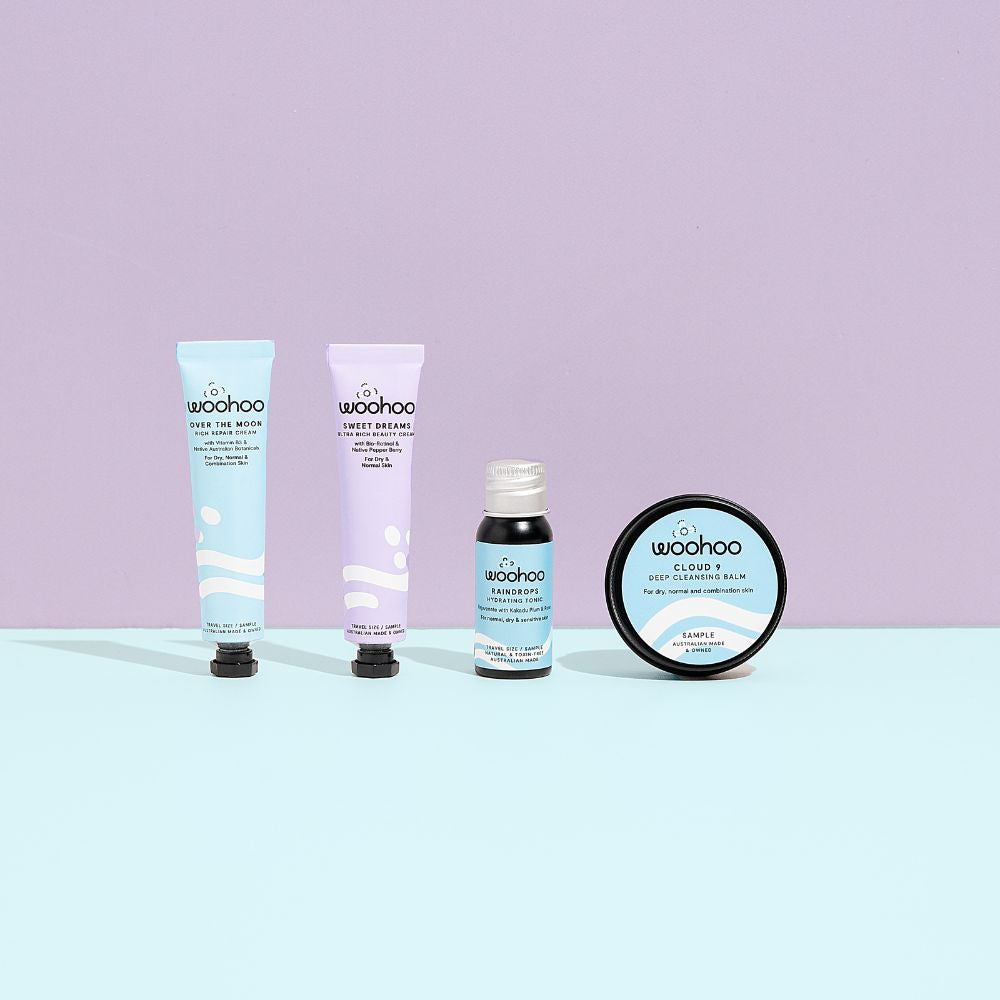
If you have been following our blog, you’ll know the power of double cleansing! We start with an oil-based cleanser (like the best selling Cloud 9 Deep Cleansing Balm or the 3 Cheers Cleansing Oil), then finish up with a water-based cleanser like the Smitten Kitten Probiotic Cleansing Milkor Chirpy Charcoal Cleansing Gel.
To avoid a cleansing calamity, make sure you use lukewarm water on your skin. Water that’s too hot can irritate the skin, quick smart. While if it’s too cold your pores won’t be cleansed as deeply, resulting in a less-than-fabulous facial.
TIP: For a truly deep cleanse, apply Cloud 9 Deep Cleansing Balm to the skin and leave on for up to 30 minutes for a super duper deep clean.
TIP: Remove your oil-based cleanser with a Konjac Sponge for some extra gentle exfoliation and stimulation of blood flow (= plumper looking skin!). This is a great option if you’re going to skip over Step #3.
STEP 3 — Time to exfoliate
Say, “see ya” to dull, bumpy skin. Exfoliation is the key to smooth, flawless canvas at any age. It sloughs away dead skin cells and stimulates the production of new cells for a fresher, more youthful appearance. Plus, it perfectly preps your skin for the next two steps and helps ingredients absorb better. What’s not to love?
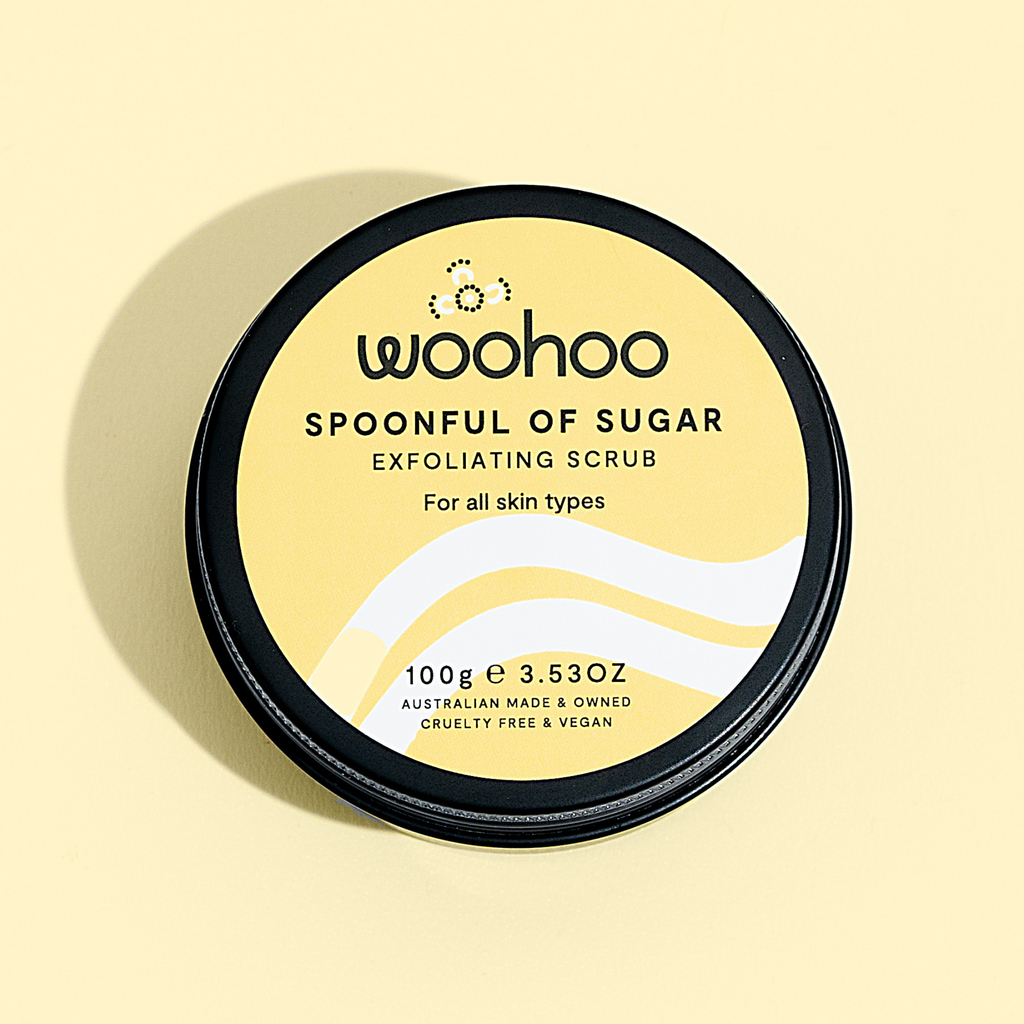
There are many ways to exfoliate, but we take a traditional approach — this involves your hands and our award-winning Spoonful of Sugar Exfoliating Scrub (which just happens to be suitable for all skin types), plus some lukewarm water and a soft cloth or Konjac sponge.
Simply add a little water to the sugary exfoliant and mix it together. Then, massage into your face using small circular movements. Pay added attention to problem areas, such as your T-zone (forehead, nose and chin). Wash your exfoliant away with warm water and your cloth or Konjac sponge and gently pat your skin dry.
TIP:Over-exfoliating can do more harm than good to your skin. So, when it comes to exfoliating, just r-e-l-a-x. Exfoliating once or twice a week is all it takes to reveal happy, healthy skin.
STEP 4 — The main event: the face mask
Applying a mask is fun for your whole face! And if you’re looking for a multi-tasking mask to address a bunch of skin woes in one fell swoop, try our Pig-In-Mud Mineral Mask.
Make sure your handy towel headband is still intact to keep your locks out of the mud. Then, grab our mixing bowland brush and add equal parts dry mask and water (Option: add a few drops of Raindrops on Roses Hydrating Tonic as a pick-me-up for parched skin).
Use your mask application brush to gently apply the mask to your face. Now, for the best bit…kick back and chillax — until the mask is dry, about 5 to 10 minutes. Once the mask is completely dry (you’ll notice it starts to look slightly cakey), rinse for your voilà: calm, happy, and balanced skin.
STEP 5 — Double the bliss: moisturise and massage
These last two steps are combined because they work wonders when used together.
Slathering your favourite moisturiser, oil or serum(or all of the above!) onto your face will bring about some serious softness and hydration to your skin. What’s more, thanks to the previous steps your skin will literally drink up all that moisture.
**Remember if you’re layering up products we go from light to heavy – serum, then oil then moisturiser.**
TIP: Extend your relaxing DIY facial experience by sitting down with a book and an herbal tea for at least 30 mins. If it means locking yourself in the bathroom or bedroom to keep the kids, dog or husband at bay – so be it!
TIP: Fancy powering-up your pampering even more? Why not extend the love to your eyes and lips straight after you mask? Apply the ever-soothing You Crack Me Up Lip Balm to your kissers and a dab of the ultra-hydrating Happily Ever After Vitamin C Eye Serum under your peepers. Talk about total face bliss!
But remember…
The most important is to make your facial your own. Do what you enjoy and what makes you feel good. Because you deserve it!